liver support

Milk Thistle for Dogs
USD $45.95
free shipping over $100 (USA & Canada)
1-877-937-4372 the pet expert hotline

100% Natural Liver and Kidney Detox and Cancer Support in Cats

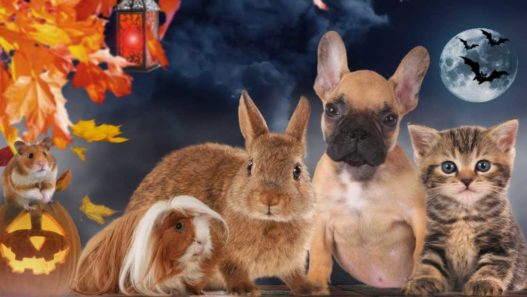
Halloween is fast approaching, but there is still plenty of time to make this adorable costume for your furkiddo! We have created an easy DIY Pet Costume so you can arrive at the #NHVhalloweendancepawty in style! Read along with the steps below or follow along with the video.
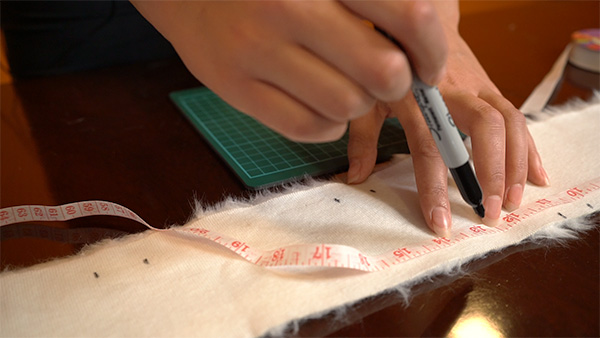
Before you buy materials, it is important to measure your pet first.
For the hat, measure the distance between your pet’s ears. This distance is the diameter of the Styrofoam ball you will need. If you cannot find this exact size, choose a size smaller than this distance.
Measure the width and length of your pet’s back to print the graphics for the shirt to fit your pet.
Step 1
The height of the hole should match the height of the ribbon you are using.
On your white faux fur or white fabric that is already cut to size, use a permanent marker to mark where you will cut rectangular holes on the backside of the fabric. The holes will be 1/2 an inch from the edge of the fabric along the top and bottom.
Note: For smaller pets, the holes should be 1/2 inch wide and spaced 2 inches apart. For larger pets, the holes should be 1 inch wide and spaced 4 inches apart. The height of the hole should match the height of the ribbon you are using.
Once all the holes are marked, use a utility knife (and a cutting mat) to cut out the rectangular holes.
Step 2
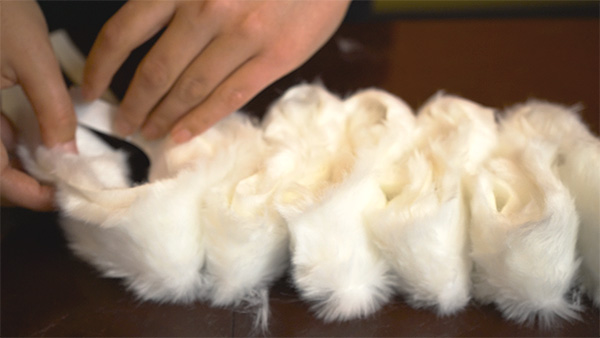
Fold the faux fur or fabric in half width-wise, with the front side facing out so that the holes along the top and the bottom line up. Feed the ribbon through the first hole and begin folding the fabric accordion-style and feeding the ribbon through each hole. Trim the ribbon to be long enough to tie around your pet’s neck plus extra.
Step 3
Loosen the accordion folds slightly and try tying the collar around your pet’s neck. Loosen the folds until the faux fur wraps all the way around the neck. Trim the excess ribbon if needed.
Step 1
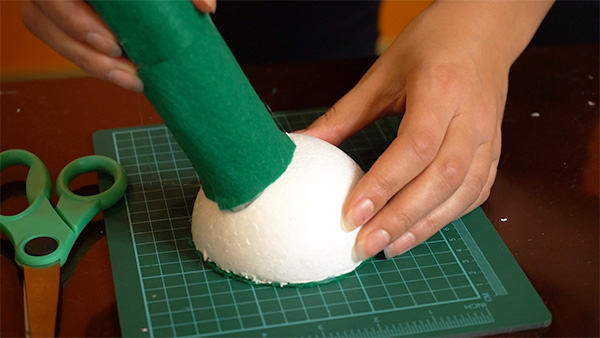
Cut the Styrofoam ball in half and glue a piece of felt to the flat side. Trim the excess felt from around the Styrofoam.
Step 2
Take the cardboard tube and trim it to be a couple inches shorter. Take more of the green felt and glue it to wrap around the tube to make the tube look like a green straw. Then glue the bottom of the tube to stand on the Styrofoam ball.
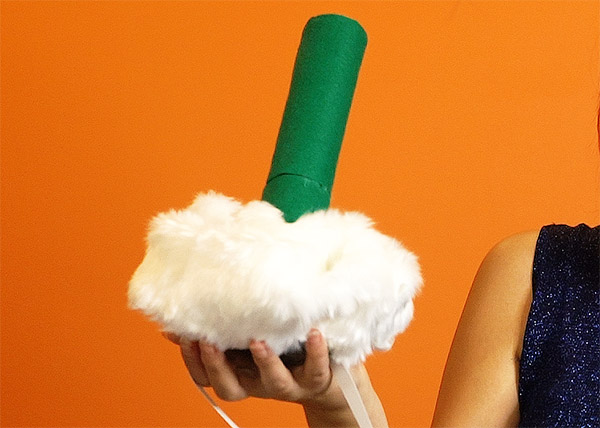
Step 3
Glue the faux fur or white fabric to wrap around the straw and around to the base of the Styrofoam ball. You will want to glue every few inches and bunch the fabric to make it resemble the wavy texture of whip cream.
Step 4
Cut to pieces of ribbon that are more than long enough to tie around your pet’s chin from the base of the hat. Glue one end of each ribbon to the felt side of the ball on opposite sides to create the straps and trim any excess ribbon if necessary.
Step 1
Print the cup graphics (see materials list for the link to download) at a size that will fit your pet. You can either print them on standard printer paper or on iron-on transfer sheets that can be found at craft or hobby stores. Trim the excess paper around the graphics.
Step 2
Try the t-shirt on your pet with the front side of the t-shirt on their back so that the label on the inside of the shirt will be on their chest and not as visible. Using the permanent marker, mark a dot in the middle of their back between the shoulder blade for reference.
Step 3
Lay the t-shirt on a table, front-side up. Glue the logo graphic on the shirt with the top of the logo covering the dot marked.
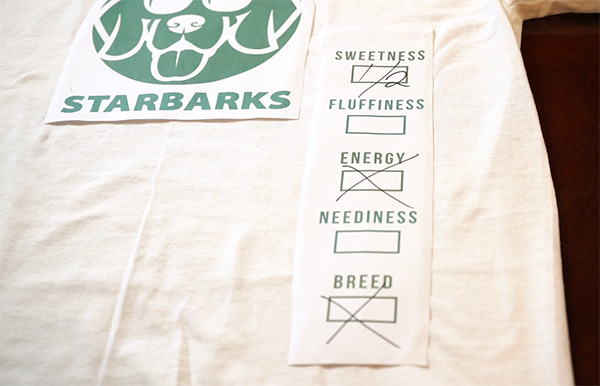
Step 4
Glue the flavor details label to the right of the logo with the top of the labels roughly lining up with the center of the logo. Feel free to add some markings to the flavor details label using your permanent marker to describe your pet before gluing it to the shirt.
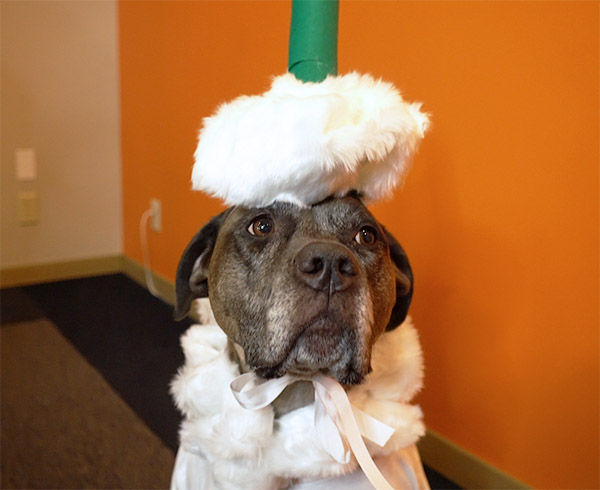
Now you’re ready to put the shirt, collar, and hat on your pet and let them strut their stuff! Tag us in pictures of your furkiddo wearing their DIY Puppaccino (or Fluffaccino for our feline friends) costume! Don’t forget to enter our #NHVhalloweendancepawty on Instagram to receive a 10% off coupon! The last day to enter the #NHVhalloweendancepawty is October 31st, 2020!
Reminder: While Halloween can be really spooky and fun, it is really important to keep your pets away from chocolate and candies. If your pet does eat some sweets, take them to the vet right away. After they have been seen by the vet, you can give your pet Milk Thistle to help their liver process the toxins in the chocolate.
liver support
Support for liver and kidney detox and cancer support in dogs
3 month supply for a small to medium size pet
What Is It?
Milk Thistle for dogs is a gentle supplement that supports liver and kidney health, helps with detoxification, and provides antioxidant protection for long-term wellness.
How Does it Work?
Why Should I Trust It?
100% natural vet-formulated herbal remedy.


What Is It?
Milk Thistle for dogs is a gentle supplement that supports liver and kidney health, helps with detoxification, and provides antioxidant protection for long-term wellness.
How Does it Work?
Why Should I Trust It?
100% natural vet-formulated herbal remedy.
Milk Thistle is a powerful herb that’s been used by humans for thousands of years. The active ingredient, silymarin, has been shown through scientific studies to possess strong anti-inflammatory, antioxidant, and detoxifying properties. It also promotes cellular regeneration and repair.
This supplement by NHV Natural Pet Products uses 100% natural milk thistle to support dogs through liver and kidney conditions in addition to conventional treatment by their veterinarian.
Milk thistle improves kidney function due to the damage from:
The extraordinary antioxidant properties of milk thistle for dog extract acts to:
The scientific name for milk thistle is Silybum Marianum. It’s also referred to as wild artichoke and holy thistle.
Milk thistle for dog liver support can be used in conjunction with conventional treatments and is glycerin based and safe for long-term use. You can read more about the benefits of using milk thistle on Dr. Hillary Cook’s blog.
At NHV, all of our products including milk thistle for dog kidney support are plant-based and make excellent proactive support for many health conditions. If you have questions on milk thistle for dogs or any of our holistic supplements, you can ask an expert at NHV because we put your pet first when it comes to health and healing naturally.

Select your pet's weight to determine the correct dose.
To be taken twice daily. Determine your pet’s weight and then use the easy chart below to determine the correct dose. This is the minimum dosage.
Pet's Weight Dosage
0 - 15 lb = 0.5 ml
16 - 30 lb = 1.0 ml
31 - 45 lb = 1.5 ml
46 - 60 lb = 2.0 ml
61 - 75 lb = 2.5 ml
Over 75 lb = 3.0 ml
How to Administer
Shake well before use. The easiest method is to use the dropper provide and places the drops into your pet’s food or favorite treat. You can also use the dropper and squirt directly into the pet’s mouth.
Some pets can be finicky, if this occurs consider hiding the drops in foods most pet’s love such as fish, chicken or yogurt or a favourite treat. If your pet only eats dry food then soak a few kibbles at feeding time.
For Best Results
Herbal dietary supplements are beneficial to the health and wellbeing of your pet and are safe for long-term use. Every pet responds to natural herbal supplements differently, therefore it is important to be consistent and administer the product daily. Supplements generally take two to four weeks to take effect, however this will vary from one animal to the next.
Product Storage
All NHV Natural Pet Products are pure herbal extracts and contain no artificial additives, preservatives or coloring. Shelf life after opening is 6 months and must be refrigerated after opening.
Cautions and Contraindications
Do not use Milk Thistle in pregnant or nursing animals. Speak to your vet before using our products. A second visit is recommended if your pet’s condition does not improve, or deteriorates after continued use of the supplements.
All information provided by NHV Natural Pet Products is for educational purposes only.
Milk Thistle is a powerful herb that’s been used by humans for thousands of years. The active ingredient, silymarin, has been shown through scientific studies to possess strong anti-inflammatory, antioxidant, and detoxifying properties. It also promotes cellular regeneration and repair.
This supplement by NHV Natural Pet Products uses 100% natural milk thistle to support dogs through liver and kidney conditions in addition to conventional treatment by their veterinarian.
Milk thistle improves kidney function due to the damage from:
The extraordinary antioxidant properties of milk thistle for dog extract acts to:
The scientific name for milk thistle is Silybum Marianum. It’s also referred to as wild artichoke and holy thistle.
Milk thistle for dog liver support can be used in conjunction with conventional treatments and is glycerin based and safe for long-term use. You can read more about the benefits of using milk thistle on Dr. Hillary Cook’s blog.
At NHV, all of our products including milk thistle for dog kidney support are plant-based and make excellent proactive support for many health conditions. If you have questions on milk thistle for dogs or any of our holistic supplements, you can ask an expert at NHV because we put your pet first when it comes to health and healing naturally.
Select your pet's weight to determine the correct dose.
To be taken twice daily. Determine your pet’s weight and then use the easy chart below to determine the correct dose. This is the minimum dosage.
Pet's Weight Dosage
0 - 15 lb = 0.5 ml
16 - 30 lb = 1.0 ml
31 - 45 lb = 1.5 ml
46 - 60 lb = 2.0 ml
61 - 75 lb = 2.5 ml
Over 75 lb = 3.0 ml
How to Administer
Shake well before use. The easiest method is to use the dropper provide and places the drops into your pet’s food or favorite treat. You can also use the dropper and squirt directly into the pet’s mouth.
Some pets can be finicky, if this occurs consider hiding the drops in foods most pet’s love such as fish, chicken or yogurt or a favourite treat. If your pet only eats dry food then soak a few kibbles at feeding time.
For Best Results
Herbal dietary supplements are beneficial to the health and wellbeing of your pet and are safe for long-term use. Every pet responds to natural herbal supplements differently, therefore it is important to be consistent and administer the product daily. Supplements generally take two to four weeks to take effect, however this will vary from one animal to the next.
Product Storage
All NHV Natural Pet Products are pure herbal extracts and contain no artificial additives, preservatives or coloring. Shelf life after opening is 6 months and must be refrigerated after opening.
Cautions and Contraindications
Do not use Milk Thistle in pregnant or nursing animals. Speak to your vet before using our products. A second visit is recommended if your pet’s condition does not improve, or deteriorates after continued use of the supplements.
All information provided by NHV Natural Pet Products is for educational purposes only.
liver support

Natural Pet Rabbit Liver Support
buy 2 and save $3
3 month supply for a small to medium size pet
What is it?
NHV Milk Thistle is a natural supplement for rabbits that helps the liver remove metabolic wastes, and helps to restore immune function as well.
How does it work?
Why trust it?
NHV uses human-grade organic milk thistle, so your pet gets the best.


What is it?
NHV Milk Thistle is a natural supplement for rabbits that helps the liver remove metabolic wastes, and helps to restore immune function as well.
How does it work?
Why trust it?
NHV uses human-grade organic milk thistle, so your pet gets the best.
If your pet is battling an illness such as cancer, or kidney disease, the buildup of toxins in their body may be affecting their liver and kidney function. This buildup of toxins often weakens the immune system as well. Milk Thistle contains the active compound silymarin, which helps detoxify the liver and helps support, strengthen and regenerate liver tissue. Research has shown that Milk Thistle may also improve kidney function.
Milk Thistle contains the active compound silymarin which has been used for thousands of years for its numerous health benefits. Studies have shown that silymarin contains effective anti-inflammatory, antioxidant, and detoxifying properties to promote regeneration and repair. Also known as wild artichoke and holy thistle, Milk Thistle is beneficial for removing toxins and metabolic wastes that may accumulate due to illness. Studies are also showing that Milk thistle may have anti-cancer properties due to its high concentration of free radical scavengers.
We know your bunnies are your family. That’s why we made our natural supplements for rabbits 100% natural, easy to administer (liquid formula) and made with only the best organic or wild-crafted, plant-based ingredients. For any questions or concerns about your furkiddo’s liver or kidney health, don’t hesitate to get in touch with an NHV Pet Expert - we’re always here to help!.
Made with the finest, organically grown, or ethically harvested herbs. Made specifically for pets, vet-formulated and vet approved.
Select your pet's weight to determine the correct dose.
For rabbits: 0.5ml (12 drops) twice daily.
How to Administer
Shake well before use. The easiest method is to use the dropper provide and places the drops into your pet’s food or favorite treat. You can also use the dropper and squirt directly into the pet’s mouth.
Some pets can be finicky, if this occurs consider hiding the drops in foods most pet’s love such as mashed banana, strawberry or another favorite treat.
For Best Results
Herbal dietary supplements are beneficial to the health and wellbeing of your pet and are safe for long-term use. Every pet responds to natural herbal supplements differently, therefore it is important to be consistent and administer the product daily. Supplements generally take two to four weeks to take effect, however this will vary from one animal to the next.
Product Storage
All NHV Natural Pet Products are pure herbal extracts and contain no artificial additives, preservatives or coloring. Shelf life after opening is 6 months and must be refrigerated after opening.
Cautions and Contraindications
Do not use Milk Thistle in pregnant or nursing animals. Speak to your vet before using our products. A second visit is recommended if your pet’s condition does not improve, or deteriorates after continued use of the supplements.
All information provided by NHV Natural Pet Products is for educational purposes only.
liver support

Natural Liver support for hamsters, guinea pigs & other small pets
buy 2 and save $3
3 month supply for a small to medium size pet
What is it?
NHV Milk Thistle is a natural liver support that may help the body remove metabolic wastes, may help to improve liver function, and may help support the kidneys as well.
How does it work?
Why trust it?
NHV Milk Thistle is a full-spectrum extract of certified organic and human-grade milk thistle.
The liver is an organ with many important functions. Its many responsibilities include filtering toxins out of the blood, releasing bile for effective digestion and more. Because the liver is so vital to the health of all pocket pets, Milk Thistle is especially beneficial for pets fighting off serious illnesses like cancer or fatty liver disease. It contains the active compound silymarin, which may help to detoxify the liver and encourages cell regeneration. Studies have shown that Milk Thistle may also help support kidney function.
Tumors are fairly common for many pocket pets, like cases of hamster liver cancer or guinea pig liver failure. Milk Thistle contains the active compound silymarin which has been used for thousands of years for its many beneficial properties. If your pet gets cancer, they will most likely be prescribed powerful cancer medications which can damage the kidneys and damage the liver. So in terms of cancer support, milk thistle is extremely beneficial to help offset the negative effects of medications and support liver function due to its rich concentration of free radical scavengers.
It’s great to know that there are ways to support your little one’s health naturally! All NHV products use only the finest organic, wild-crafted ingredients and formulated by the combined efforts of a master herbalist and veterinarian with 50+ years of experience. If you have any questions about natural liver support or need any holistic advice, please get in touch with an NHV Pet Expert - we are always happy to help!
Made with the finest, organically grown, or ethically harvested herbs. Made specifically for pets, vet-formulated and vet approved.
Select your pet's weight to determine the correct dose.
For ferrets: 0.5ml twice a day
For rabbits and guinea pigs: 0.5 ml twice a day
For hamsters and mice: 1 drop per two pounds twice a day
How to Administer
Shake well before use. The easiest method is to use the dropper provide and places the drops into your pet’s food or favorite treat. You can also use the dropper and squirt directly into the pet’s mouth.
Some pets can be finicky, if this occurs consider hiding the drops in foods most pet’s love such as mashed banana, strawberry or another favorite treat.
For Best Results
Herbal dietary supplements are beneficial to the health and wellbeing of your pet and are safe for long-term use. Every pet responds to natural herbal supplements differently, therefore it is important to be consistent and administer the product daily. Supplements generally take two to four weeks to take effect, however this will vary from one animal to the next.
Product Storage
All NHV Natural Pet Products are pure herbal extracts and contain no artificial additives, preservatives or coloring. Shelf life after opening is 6 months and must be refrigerated after opening.
Cautions and Contraindications
Do not use Milk Thistle in pregnant or nursing animals. Speak to your vet before using our products. A second visit is recommended if your pet’s condition does not improve, or deteriorates after continued use of the supplements.
All information provided by NHV Natural Pet Products is for educational purposes only.
We have a dedicated group of pet expert professionals, including veterinarians, vet techs, and other pet professionals to guide you through any questions. We’re committed to your pet’s wellness and can offer additional tips, resources, nutritional advice, and more.
Published: October 30, 2020
liver support
100% Natural Liver and Kidney Detox and Cancer Support in Cats
buy 2 and save $3
3 month supply for a small to medium size pet
What Is It?
Milk Thistle is a well-known herb among conventional and holistic veterinarians, often recommended for cats who have liver disorders, are fighting cancer, diabetes, kidney issues, gallbladder and bile duct issues, as well as hyperthyroidism.
How Does it Work?
Why Should I Trust It?
100% natural supplement approved and formulated by vets.
Milk thistle, also known as Silybum Marianum is an herb that has been used for thousands of years by humans for its powerful medicinal properties. The active ingredient is Silymarin which contains flavonoids that have many beneficial properties including:
Milk thistle is one of the few herbs that have no equivalent in conventional medicine and has many uses. You can read about the many applications of Milk Thistle for cats and dogs on Dr. Hillary Cook's blog.
Milk Thistle for Liver Function
Milk Thistle for cats with liver disease is glycerin-based and safe for long-term use. This potent herbal formula provides excellent proactive support and can be taken in conjunction with conventional treatment.
Milk Thistle for Kidney Function
Milk Thistle for Anti-Cancer Support
Milk Thistle may also be beneficial to cats undergoing chemotherapy as Silymarium may enhance the activity of certain chemo drugs.
You can read Peachez's Story with Milk Thistle for cats and how it helped her with cancer and liver problems.
NHV’s certified organic Milk Thistle is a safe herb that is recommended and used by holistic practitioners. All of our products are all-natural and formulated by veterinarians with a focus on comprehensively supporting the health and well-being of your feline family member.
If you have questions about Milk Thistle or any of our plant-based products, ask an NHV expert because at NHV we want your kitty’s health to be purrfect!

NHV’s Milk Thistle for Cats contains just one ingredient.
Select your pet's weight to determine the correct dose.
To be taken twice daily. Determine your pet’s weight and then use the easy chart below to determine the correct dose. This is the minimum dosage.
Pet's Weight Dosage
0 - 15 lb = 0.5 ml
16 - 30 lb = 1.0 ml
31 - 45 lb = 1.5 ml
46 - 60 lb = 2.0 ml
61 - 75 lb = 2.5 ml
Over 75 lb = 3.0 ml
How to Administer
Shake well before use. The easiest method is to use the dropper provide and places the drops into your pet’s food or favorite treat. You can also use the dropper and squirt directly into the pet’s mouth.
Some pets can be finicky, if this occurs consider hiding the drops in foods most pet’s love such as fish, chicken or yogurt or a favorite treat. If your pet only eats dry food then soak a few kibbles at feeding time.
For Best Results
Herbal dietary supplements are beneficial to the health and wellbeing of your pet and are safe for long-term use. Every pet responds to natural herbal supplements differently, therefore it is important to be consistent and administer the product daily. Supplements generally take two to four weeks to take effect, however this will vary from one animal to the next.
Product Storage
All NHV Natural Pet Products are pure herbal extracts and contain no artificial additives, preservatives or coloring. Shelf life after opening is 6 months and must be refrigerated after opening.
Cautions and Contraindications
Do not use Milk Thistle in pregnant or nursing animals. Speak to your vet before using our products. A second visit is recommended if your pet’s condition does not improve, or deteriorates after continued use of the supplements.
All information provided by NHV Natural Pet Products is for educational purposes only.
Milk thistle, also known as Silybum Marianum is an herb that has been used for thousands of years by humans for its powerful medicinal properties. The active ingredient is Silymarin which contains flavonoids that have many beneficial properties including:
Milk thistle is one of the few herbs that have no equivalent in conventional medicine and has many uses. You can read about the many applications of Milk Thistle for cats and dogs on Dr. Hillary Cook's blog.
Milk Thistle for Liver Function
Milk Thistle for cats with liver disease is glycerin-based and safe for long-term use. This potent herbal formula provides excellent proactive support and can be taken in conjunction with conventional treatment.
Milk Thistle for Kidney Function
Milk Thistle for Anti-Cancer Support
Milk Thistle may also be beneficial to cats undergoing chemotherapy as Silymarium may enhance the activity of certain chemo drugs.
You can read Peachez's Story with Milk Thistle for cats and how it helped her with cancer and liver problems.
NHV’s certified organic Milk Thistle is a safe herb that is recommended and used by holistic practitioners. All of our products are all-natural and formulated by veterinarians with a focus on comprehensively supporting the health and well-being of your feline family member.
If you have questions about Milk Thistle or any of our plant-based products, ask an NHV expert because at NHV we want your kitty’s health to be purrfect!
NHV’s Milk Thistle for Cats contains just one ingredient.
Select your pet's weight to determine the correct dose.
To be taken twice daily. Determine your pet’s weight and then use the easy chart below to determine the correct dose. This is the minimum dosage.
Pet's Weight Dosage
0 - 15 lb = 0.5 ml
16 - 30 lb = 1.0 ml
31 - 45 lb = 1.5 ml
46 - 60 lb = 2.0 ml
61 - 75 lb = 2.5 ml
Over 75 lb = 3.0 ml
How to Administer
Shake well before use. The easiest method is to use the dropper provide and places the drops into your pet’s food or favorite treat. You can also use the dropper and squirt directly into the pet’s mouth.
Some pets can be finicky, if this occurs consider hiding the drops in foods most pet’s love such as fish, chicken or yogurt or a favorite treat. If your pet only eats dry food then soak a few kibbles at feeding time.
For Best Results
Herbal dietary supplements are beneficial to the health and wellbeing of your pet and are safe for long-term use. Every pet responds to natural herbal supplements differently, therefore it is important to be consistent and administer the product daily. Supplements generally take two to four weeks to take effect, however this will vary from one animal to the next.
Product Storage
All NHV Natural Pet Products are pure herbal extracts and contain no artificial additives, preservatives or coloring. Shelf life after opening is 6 months and must be refrigerated after opening.
Cautions and Contraindications
Do not use Milk Thistle in pregnant or nursing animals. Speak to your vet before using our products. A second visit is recommended if your pet’s condition does not improve, or deteriorates after continued use of the supplements.
All information provided by NHV Natural Pet Products is for educational purposes only.